This DIY Wood Chalkboard Calendar is a stylish, functional staple piece in my command center organization efforts.
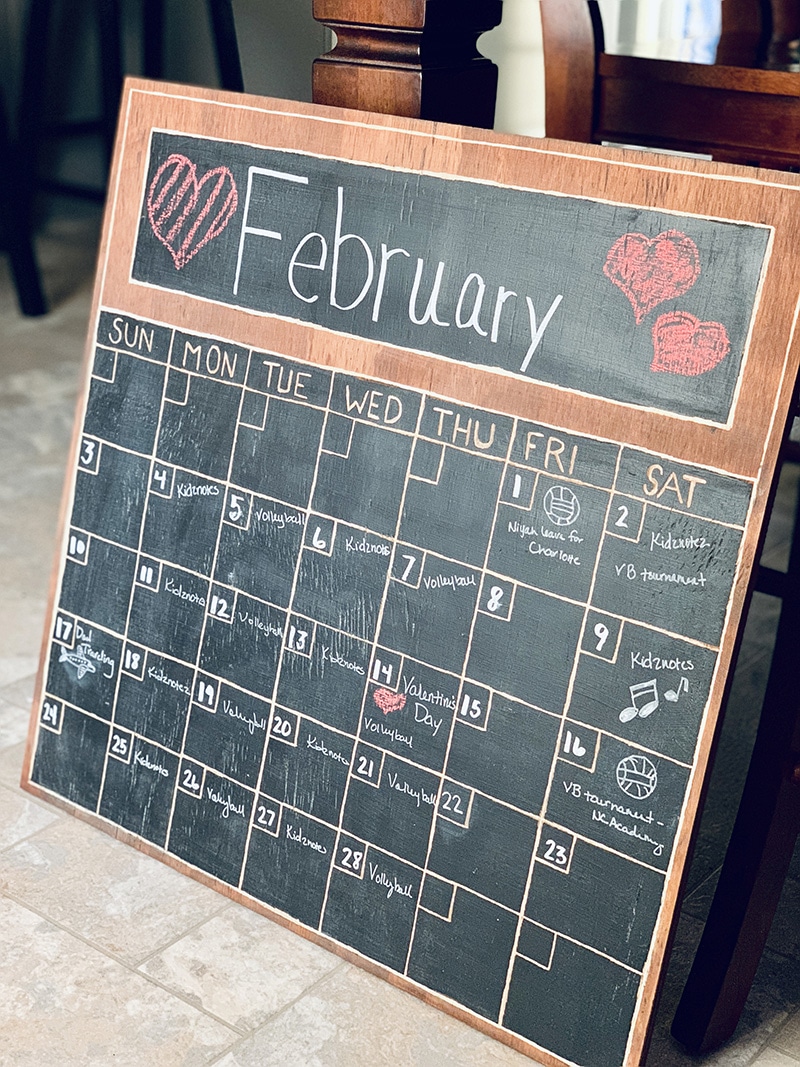
Last year I decided my family needed a command center, to help us (me) command order around everyone’s schedules, mail, and all the different paperwork that would end up on my kitchen countertop.
With good intentions I created it, and I thought I loved it, but then I realized it was not as functional as I had hoped and dreamed it would be.
One of the problems was the dry erase calendar that I used. It was too small, which made it hard to document all the things we had going on, and because it was in the middle with the buffet sitting in front of it, updating it monthly became a headache.
So that is how this DIY Chalkboard Calendar came to exist.
What I Used To Make My Chalkboard Wall Calendar
With minimal materials and time, I was able to pull this DIY calendar project together. Which, is the first step in giving my command center a new life. One with more functionality and the ability to serve its actual intended purpose.
Using my Dremel Stylo, a 2×2 block of wood, and some DecoArt Chalkboard paint magic happened.
Any project using my Dremel is pretty much an in-home therapy session. The vibration of the Dremel always is so soothing for me.
The DecoArt Chalkboard paint is super easy to use, and can be used on multiple surfaces including, but not limited to, wood, porcelain, and metal.
The Steps To Creating a Wood Chalkboard Wall Calendar
The drying time was the longest part of this project. Allowing the wood to properly dry between steps is what took the most time. These are the steps to creating the calendar:
- Staining
- Creating the outline
- Painting the chalkboard portions
- Cleaning the outline
- Creating the calendar grid
- Adding minor details
How To Create a DIY Wood Chalkboard Wall Calendar
Start by spreading your dropcloth on your work surface and lay your wood board flat on the dropcloth.
Using an application brush or sponge, apply your favorite stain color to the front surfaces and around edges of the board. I prefer the use of application sponges personally when working with stain. They just work better for me personally.
And right now I am completely in love with the Early American color.
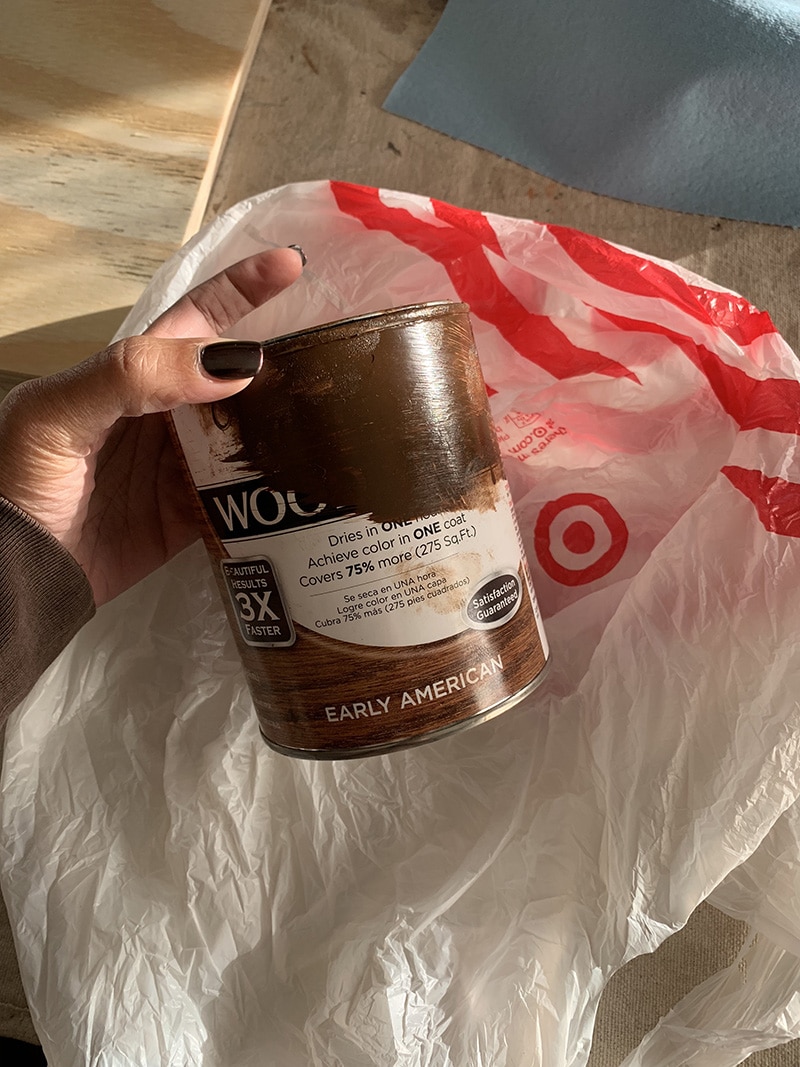
After applying the stain, allow 2-3 minutes for the stain to penetrate the wood and then wipe the excess away using a clean white rag. Or you could use a lambskin pad. I'm not fancy, at least not this time.
Allow time to dry according to directions on stain container. I let mine dry in the garage for a few hours and went back to it.
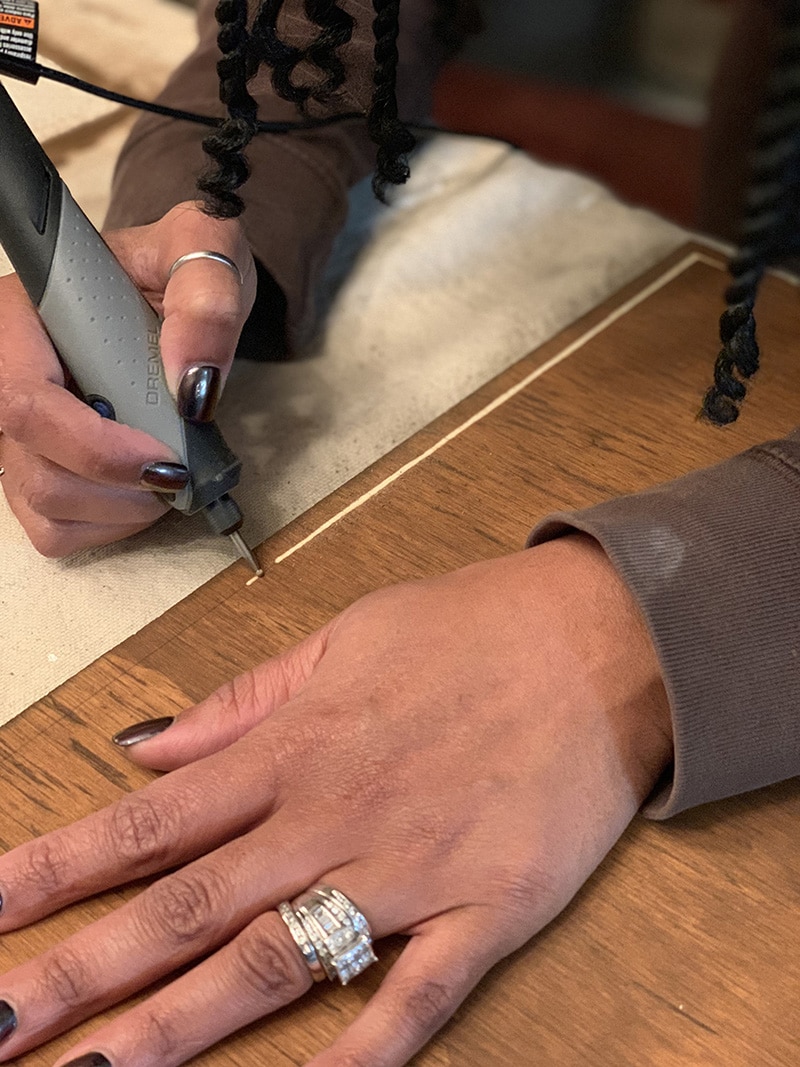
After your stain has dried, measure a border around the board. I chose a ¼” all the way around. This part will stay a wood finish.
Using the Dremel Stylo+ and the .08″ tip attachment carve out your border using the lines that you measured.
Measure the calendar dates space to plan for the calendar box. My measurements are 3.3” wide by 3” tall boxes, and 1.5” height for the weekday space. So my box ended up being 16.5” x 23”.
Carve out the outline for your full calendar square using the Dremel.
Paint the square using the DecoArt Chalkboard paint following the instructions on the package. It calls for two coats in total. First coat applied in one direction. Allow at least an hour to dry and apply the second coat in the opposite direction. Allow the paint to dry fully.
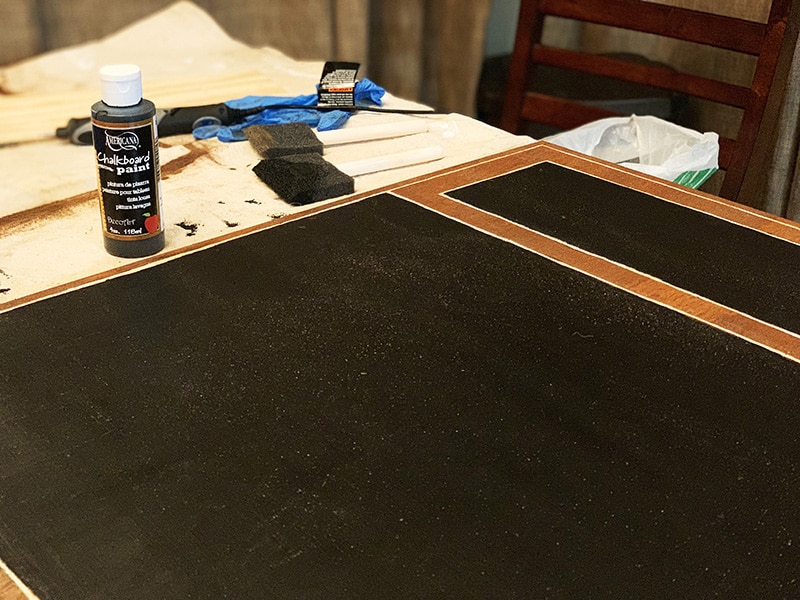
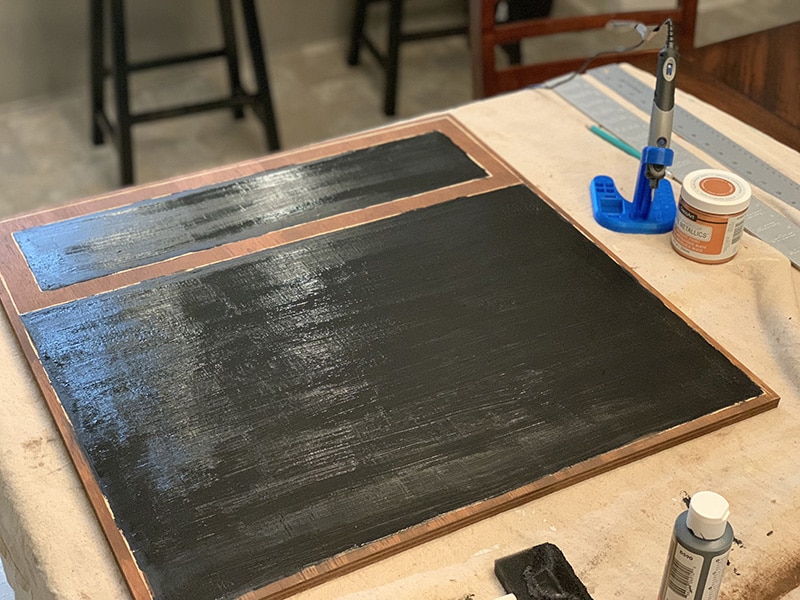
Using your ruler, speed square, and a chalk pencil, sketch out your vertical calendar lines. Then sketch out those lines using your Dremel.
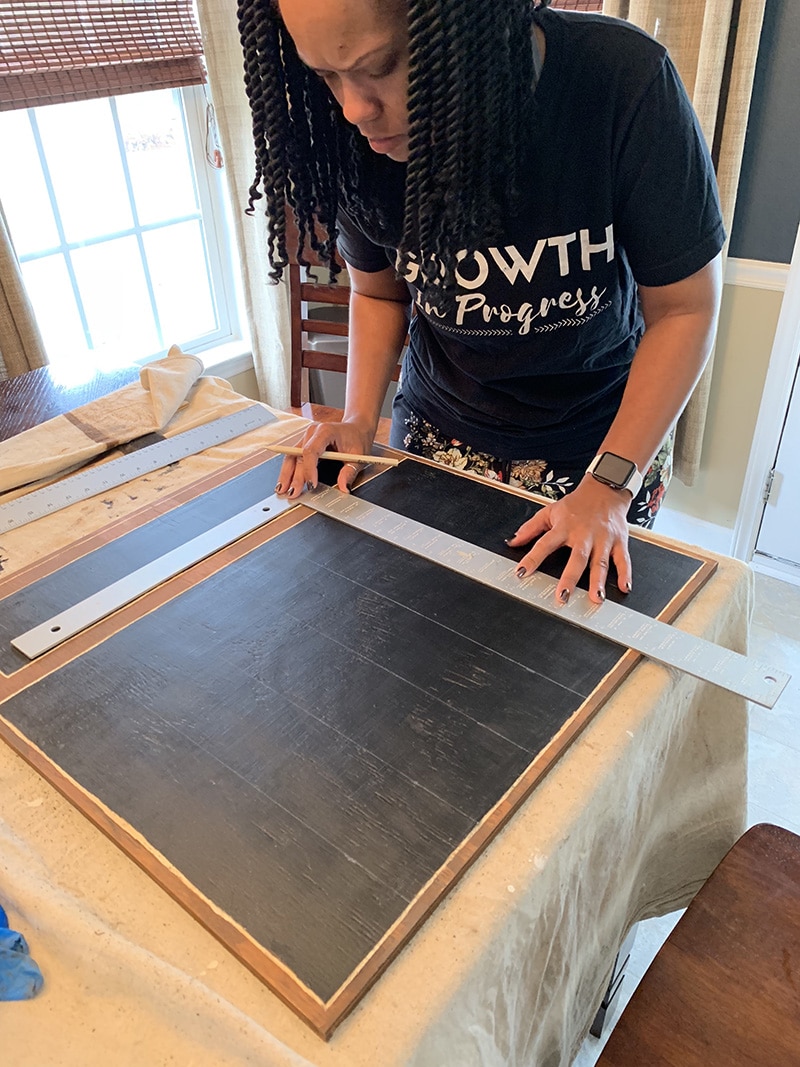
Repeat and do the same thing for the horizontal lines of your DIY wall calendar.
Measure out the month space for your calendar. I chose to leave an inch inside all the way around. So my month space measures 21″ x 5″. Sketch this space using your Dremel.
Lastly, I did my actual date squares within the larger squares. This is done by using the speed square. Measure out 1”x1” squares in the upper left corner of each of the calendar squares. Then use your Dremel to sketch out each of those squares.
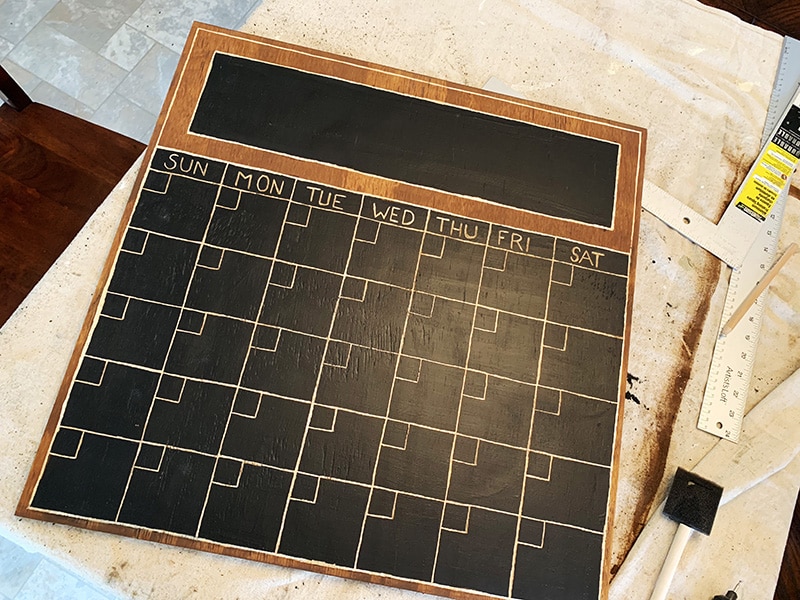
If you chose, you can add in your dates of the weeks with the Dremel or write them in each month when you update the calendar with chalk. I decided to do mine with the Dremel. It was a little more challenging than doing the straight lines. But I also love the character it adds.
After 24 hours when the chalkboard paint has fully cured, cover the entire chalkboard with chalk and wipe clean with a rag wet with water.
And lastly, if you plan to hang it on the wall, add picture hangers and hang on the wall.
Can You Use Chalkboard Markers on This Chalkboard
I did. And they seem to work well. I have read chalk markers are only good on certain surfaces. So the use of markers may cause the paint to come off. Use at your own risk!
UPDATE: Do NOT use chalkboard markers! The removed fine when I tried them and erased right away. But at the end of the month, they left the chalkboard stained. Luckily it was an easy fix. I just painted over the stained parts with more chalkboard paint, and you cant even tell.
Now I am only using regular chalk. So you have been warned.


But if you use chalk and want to avoid the mess of regular chalk you can always use these chalk holders to avoid breaking chalk and making a mess of your fingers.

The DIY Challenge
Every month this year myself and 37 other DIYer’s like myself have teamed up to bring you some awesome DIY inspiration. This months theme is Home Organization. We are challenging ourselves to create useful projects that aid in organizing, repurposing and overall beautifying your home. For a full list of the participants and see all the projects created throughout this challenge head over to the At Home DIY Challenge page.

Wood Chalkboard Wall Calendar Project
Equipment
- Dremel Stylo+
- Ruler
- Speed Square
- Protective eyewear
- Screwdriver
Materials
- 2 x2 wood board
- Stain
- Application brush
- Rag
- Drop cloth
- Chalkboard paint
- Application sponge
- Gloves
- Chalk pencil
- Picture Hangers, optional
Instructions
- Lay your dropcloth on your work surface and lay your wood board flat on the dropcloth.
- Using an application brush, apply the stain to the front surfaces and around edges of the board.
- Allow 2-3 minutes for the stain to penetrate and then wipe excess using a clean white rag.
- Allow time to dry according to directions on stain container.
- Measure boarder of the board. I chose a ¼” all the way around.
- Using the Dremel Stylo+ and the ___ tip attachement carve out your border.
- Measure the calendar dates space to plan for the calendar box. My measurements are 3.3” wide by 3” tall boxes and 1.5” for the weekday space. Making my box ended up being 16.5” x 23”.
- Carve out the outline for your calendar square using the Dremel.
- Paint the square using the DecoArt Chalkboard paint following the instructions. Two coats in total. First coat applied in the same direction. Allow at least an hour to dry and apply the second coat in opposite direction. Allow paint to dry fully.
- Using your ruler, speed square, and a chalk pencil, sketch out your horizontal calendar lines. Sketch out those lines using your Dremel.
- Repeat and do the same thing for the vertical lines of your calendar.
- Measure out the month space for your calendar. I chose to leave an inch inside all the way around.
- Using the speed square measure out 1”x1” squares in the upper left corner of each of the calendar squares. Use your Dremel to sketch out each of those squares.
- If you chose, you can add in your dates of the weeks with the Dremel or write them in each month when you update the calendar.
- After 24 hours when the chalkboard paint has fully cured, cover the entire chalkboard with chalk and wipe clean with a rag wet with water.
- Add picture hangers and hang on the wall.
Video

Other Kenya Rae Projects You May Love:
- How To Make a DIY Dog Bed For Under $25 Bucks
- DIY Indoor Herb Garden
- DIY Wood Planked Wall Using Weaber Weathered Boards






39 Comments