


A simple and easy DIY twig wreath tutorial that lends up all the rustic fall decor charm.
Is it just me or did fall creep up?
Maybe it’s the fact that as I made this wreath it was still 90+ degrees around these parts. That made my mind have a hard time processing it all, but according to the calendar, it was and is in fact fall. So I’m trying to get my decor updates to reflect that.
I always love making wreaths. It’s where I start when it’s time to update decor around the house. For this fall I wanted something simple and easy and this twig branch wreath with a little added pizzazz did the trick for me.
If you are looking for a simple and easy wreath idea that requires minimal supplies and time, you are in the right place!

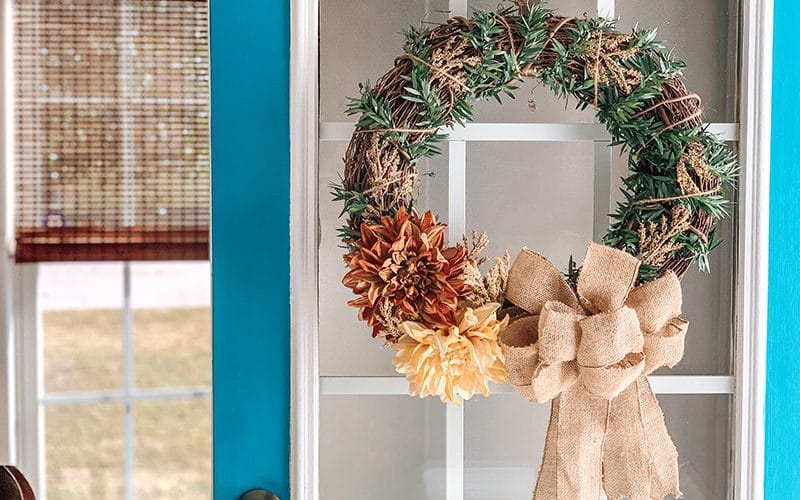
Materials Used For DIY Twig Fall Wreath
- Twig Wreath base
- Bow
- Mini Leaf Garland
- Flowers of choice
- Twine
This was one of the easiest and fastest wreaths I’ve made. And seeing how I am still seemingly trying to get my life together after, back-to-school, and being on a regular schedule, I truly appreciate the amount of time this did not take.
How To Make This Rustic Fall Wreath
I started out by clipping the stems of my flowers using wire cutters.

It made it easier to cut if I bent where I wanted to cut a couple of times before attempting to actually cut.
I left about an inch and a half of stem to help with sticking them in the wreath.
Then I sat the flowers aside until I was ready for them.

From there I wrapped the mini leaf garland around the wreath. Spacing it out as I wrapped.

Then I added my flowers and the fuzz around the wreath.
I then wrapped the twine around it to hold everything in place.

And lastly, I added my bow.
That really all there is to it. Not a lot of steps and a simply beautiful outcome.
Simple. Easy. And perfect fall decor for the front (or any) door.

DIY Fall Twig Wreath Project
Equipment
- Wire Cutters
- [Glue gun]
Materials
- Twig Wreath base
- Bow
- Mini Leaf Garland
- Flowers of choice
- Twine
Instructions
- Clip the stems of the flowers using wire cutters.
- Set the flowers aside until you are ready for them.
- Wrap the mini leaf garland around the wreath. Spacing it out as you wrap.
- Add the flowers and the fuzz around the wreath.
- Wrap the twine around it to hold everything in place.
- Add the bow.
Video
Pin The Fall Twig Wreath For Later
