


Burlap wreaths are a wonderful addition to any home decor. And making a burlap DIY wreath is a super easy DIY project! They are versatile, durable, and perfect for every season and any time of year. Whether you are looking to decorate your front door, mantle, or wall, a burlap wreath can add a touch of rustic charm to any space.

In this blog post, we will explore how to make a burlap DIY wreath that is simple, affordable, and customizable.
Why is a burlap wreath good for any season
A burlap wreath is good for any season because it is a neutral and versatile material that can be dressed up or down depending on the occasion.
Burlap has a rustic and natural look that works well with a variety of decor styles, and it can be easily customized with different types of decorations to suit any season.
For example, you can add flowers or greenery for a spring or summer wreath, pumpkins and leaves for a fall wreath, or pinecones and berries for a winter wreath.
Additionally, burlap is a durable and long-lasting material that can withstand different weather conditions, making it a great choice for outdoor wreaths.
Overall, a burlap wreath is a classic and timeless decoration that can be enjoyed year-round.
What are the different DIY burlap wreath making techniques
There are several different techniques for making burlap DIY wreaths, each with its own unique style and method. Which method ou use is dependent on the type of wreath you are looking to make.
Here are a few of the most popular burlap wreath making techniques:
Looped method
In this technique, you loop the burlap ribbon around the wreath form, securing it with floral wire or zip ties as you go. The loops are layered on top of each other to create a full and fluffy wreath.
Ruffled method
The ruffled method involves gathering the burlap ribbon to create ruffles or folds, which are then attached to the wreath form using floral wire or hot glue. This technique creates a more textured and dimensional wreath.
Braided method
In the braided method, you braid multiple strands of burlap ribbon together before attaching them to the wreath form. This creates a unique and intricate-looking wreath.
Wrapped method
The wrapped method involves wrapping the burlap ribbon tightly around the wreath form, securing it with floral wire or hot glue as you go. This technique creates a more streamlined and modern-looking wreath.
Bubble method
The bubble method involves bunching the burlap ribbon into small loops, which are then secured to the wreath form using floral wire or zip ties. This creates a wreath with a bubbly and playful appearance.
These are just a few of the many techniques you can use to make a burlap wreath. Each method produces a different style of wreath, so choose the technique that best suits your personal style and preferences.
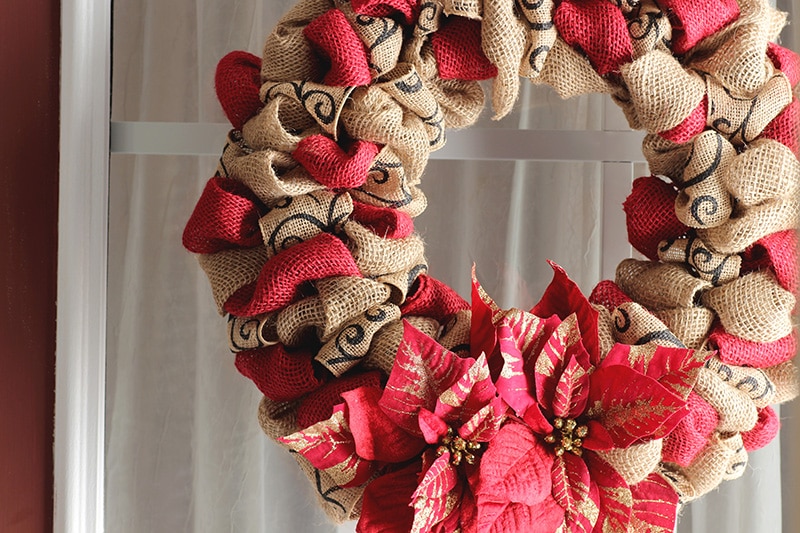
For this DIY Christmas Burlap Wreaths project, I am using the Loop method to make this burlap DIY wreath.
How much burlap is needed to make a DIY wreath
The amount of burlap needed to make a DIY wreath depends on the size of the wreath frame and the desired fullness of the wreath.
For a standard 12-inch wreath frame, you will need approximately 30-40 yards of burlap ribbon, depending on how tightly you bunch the ribbon and how full you want the wreath to be.
For larger wreaths, you may need more burlap ribbon, while smaller wreaths will require less. It's always a good idea to have extra burlap ribbon on hand, just in case you need more to finish your wreath.
What supplies are needed to make a burlap wreath
Materials Needed
- Roll of Burlap – you can use all different colors of burlap
- Wire Wreath Form, Wire Frame, or wire wreath frame
- Flowers (optional)
Tools Needed
- Glue gun (optional)
- Glue sticks (optional)
- Scissors
Where can you buy burlap to make a wreath
Burlap can be purchased at a variety of craft stores, fabric stores, and online retailers. Here are some places where you can buy burlap to make a wreath:
- Craft store – Popular craft stores like Michaels, Hobby Lobby, and Joann's carry burlap in a variety of colors and patterns. You can usually find burlap ribbon, burlap fabric, and burlap mesh in the floral or ribbon sections of these stores.
- Fabric store – Fabric stores like Fabric.com, Joann's, and Hancock Fabrics carry burlap fabric by the yard. This is a good option if you want to create a custom-sized wreath or if you want to use burlap for other DIY projects.
- Online retailer – Online retailers like Amazon, Etsy, and BurlapFabric.com offer a wide selection of burlap products, including burlap ribbon, burlap mesh, and burlap fabric. These retailers often offer bulk pricing and a variety of colors and patterns to choose from.
- Dollar store – You can even find burlap at the dollar store or dollar tree in some areas.
When purchasing burlap for your wreath, consider the thickness and quality of the burlap. Thicker burlap is sturdier and will hold up better over time, while thinner burlap is more pliable and easier to work with. Additionally, look for burlap that is tightly woven to avoid fraying and unraveling.
What are some things you can use to add to a burlap wreath
There are countless options for adding decorations to a basic burlap wreath, depending on your personal style and the occasion you are creating the wreath for. Here are a few ideas for things you can use to add to a burlap wreath:
Flowers – Adding faux flowers to a burlap wreath is a great way to add color and dimension. You can use dried or silk flowers. Or even add fresh flowers if you plan to display the wreath indoors. Flowers are always a great addition for a spring burlap wreath.

Ribbon – Adding accent ribbon to a burlap wreath can create a fun and festive look. You can use a coordinating color of ribbon or choose a patterned ribbon to add some extra visual interest.
Greenery – Adding greenery to a burlap wreath can create a natural and organic look. You can use artificial or real greenery, such as eucalyptus or ivy. Any of these things will give your wreath a farmhouse burlap wreath feel.

Ornaments – Adding ornaments to a burlap wreath is a great way to dress it up for the holiday season. You can use small ornaments, such as mini Christmas balls or Easter eggs, or larger ornaments for a bold statement.
Letters or monograms – Adding letters or a monogram to a burlap wreath can create a personalized touch. You can use wooden or metal letters, or use vinyl or paint to create a custom monogram.
Seasonal items – Adding seasonal items, such as pumpkins or pine cones for a fall burlap wreath can help your burlap wreath reflect the season or occasion you are celebrating.
These are just a few ideas for adding decorations to a burlap wreath. The possibilities are endless, so feel free to get creative and experiment with different combinations of decorations.
Easy Step by Step Instructions


- Take the end of your first burlap and tie a knot from under the wreath form or the back of the frame, starting with the most inner ring. If you are doing more than one color, do this for each one. All on different rows.
- Fold the burlap down the middle and pull through the wreath form.
- Twist the burlap once and repeat a new loop next to the previous loop. If using more than one color, alternate between colors in a pattern you love.
- Repeat until you reach near the end of the burlap ribbon. With enough to tie, tie the end of the ribbon into a knot in the same fashion as the beginning to the wreath form.
- Start a new string of burlap in the same fashion and continue until the wreath form is filled with the last loop.
And that’s it friends. You just made a whole wreath in 5 easy steps!
If you feel fancy and want to add a flower you can add flowers to your wreath using pipe cleaners or zip ties.


Save and or share this DIY Burlap Wreath Tutorial using the share buttons below.

DIY Christmas Burlap Wreath Project
Equipment
- Glue gun (optional)
- Glue sticks (optional)
- Scissors
Materials
- Natural Burlap
- Red Burlap
- Patterned burlap ribbon, simila
- Wired Wreath Form
- Flowers, optional
Instructions
- Take the end of your first burlap and tie a knot from under the wreath form. If you are doing more than one color, do this for each one. All on different rows.
- Fold the burlap down the middle and pull through wreath form.
- Twist burlap once and repeat. If using more than one color alternate between colors in a pattern you love.
- Repeat until you reach the near end of the burlap. With enough to tie, tie end into a knot in the same fashion as beginning to the wreath form.
- Start new string of burlap in the same fashion and continue until wreath form is filled.
Hi there! I am hoping to make a burlap wreath. What size width of burlap did you use? Is it wired burlap ribbon or regular that you used? Thanks!