If you're looking to maximize the storage space in your home office while adding a touch of sophistication, DIY built in office cabinets are a great solution. Not only do they provide storage for your office supplies, but they can also enhance the aesthetics of your workspace.
Building your own cabinets may seem overwhelming, but with the right tools, materials, and a bit of DIY know-how, it's a manageable project.
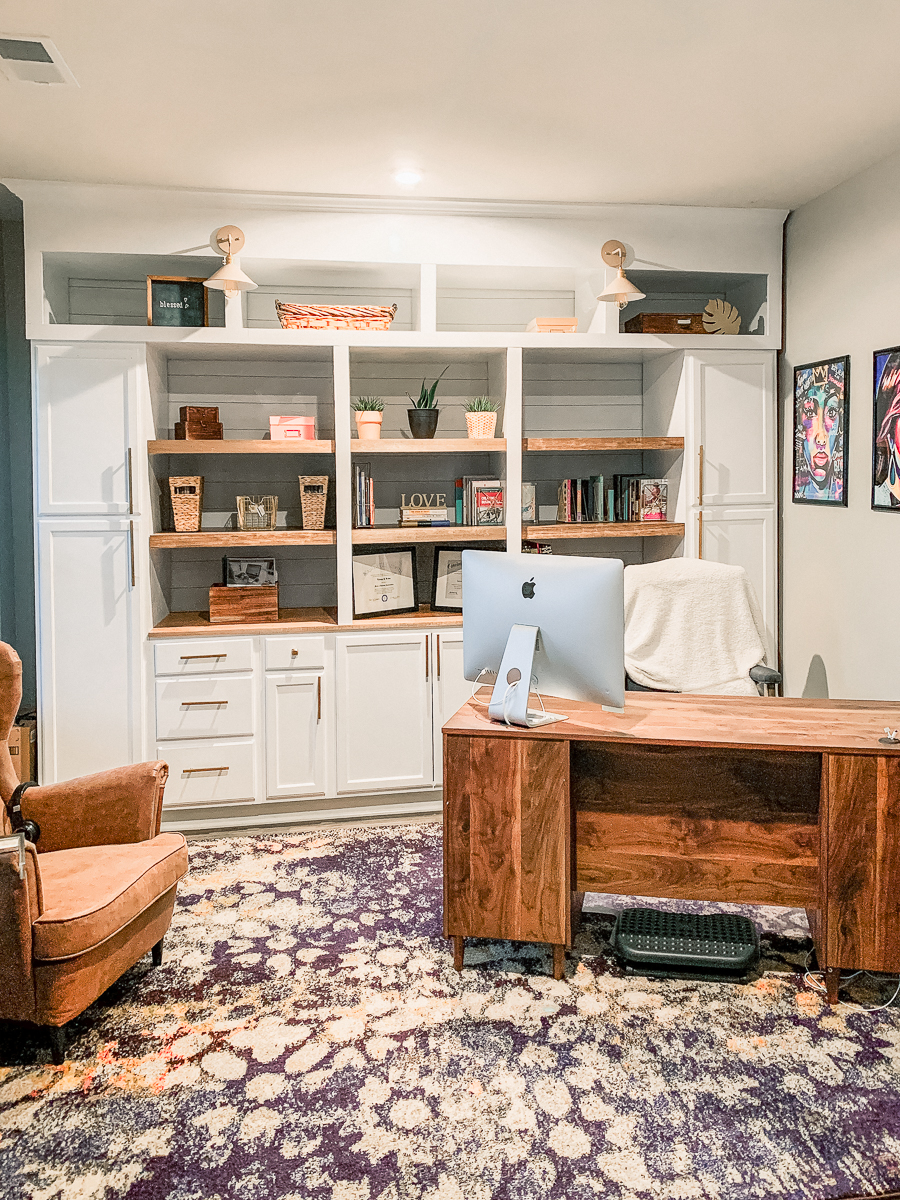
In this blog post tutorial, I’ll share with you how we planned, installed, and completed my DIY home office built in cabinet wall unit. You can use this as a guide through the process of building your own DIY home office built-in cabinets.
From planning and preparation to construction and installation, we'll cover everything you need to know to create your very own custom built-in cabinets for your home office.
Why Home Office Built Ins Are a Great Option
Working from home has become more popular than ever, and having a designated workspace is essential for productivity and focus.
One way to organize and enhance your home office is by installing DIY cabinets.
Here are some reasons why DIY home office cabinets are a great option:
Cost-Effective
DIY cabinets are a cost-effective solution to enhance your home office. You can choose from various materials and designs, and with a little bit of creativity, you can create custom cabinets that suit your needs.
Customizable
DIY cabinets are highly customizable, giving you the freedom to create cabinets that suit your preferences and fit the size of your home office. You can choose from a range of materials, such as wood, metal, or laminates, and customize the cabinets' size, shape, and design.
DIY cabinets also provide the opportunity to add personalized details, such as decorative hardware or unique finishes.
Improved Organization
One of the significant benefits of DIY cabinets is that they can help you organize your home office better.
By installing cabinets, you can declutter your workspace and store essential items, such as files, papers, books, and office supplies. With custom cabinets, you can create a place for everything, reducing the clutter on your desk and providing easy access to the items you need.
Increased Functionality
Cabinets can increase the functionality of your home office.
You can create cabinets that incorporate various features, such as pull-out shelves, file drawers, and built-in desks. With the right design, you can create a workspace that suits your specific needs and enhances your overall vibe.
Value-Adding
With all of the projects that I do, I am typically thinking about whether they will add value to my home if Iisted it tomorrow. Built in cabinets can add value to your home.
A well-designed and functional home office can increase the appeal of your property, especially if you plan to sell it in the future.
DIY cabinets can also make your home office stand out from the rest, giving you a unique selling point that can set your property apart.
Things To Consider When Doing A DIY Cabinet Wall Unit In A Home Office
I wish I could tell you how long I have wanted to do custom home office built ins.
Actually, I can…
Since about 2012.
I know this because that is when we bought and moved into our second home. I could see all of its potential once my project list was complete.
But we sold that house without ever getting around to actually building and installing those built-in cabinets on each side of the fireplace that I wanted.
While I have listed the benefits of installing custom office built-ins, there are some considerations to keep in mind before getting the project started.
Here is a list of considerations for building DIY build ins
Space and Layout
Consider the amount of space you have available and the layout of your home office. Determine the dimensions of the wall unit you want to create, and ensure that it fits well in the space without being too overwhelming.
Consider the placement of your desk and other furniture, and make sure that the cabinet unit does not obstruct any walkways or natural light.
Materials
Choose the right materials for your DIY cabinet wall unit. Consider the weight of the items you want to store in the cabinets and select materials that can support their weight.
Also, consider the style and design of your home office and select materials that complement the existing décor.
Tools and Equipment
Ensure that you have the right tools and equipment before starting the project.
Common tools needed for cabinet installation include a measuring tape, level, saw, drill, screws, and a screwdriver.
Make sure that you have the right tools and that they are in good working condition.
Storage Needs
Think about what you need to store in the cabinet wall unit. Determine the number of shelves, drawers, and cabinets you need, and their dimensions.
Consider the size of your files, books, and other office supplies, and ensure that the cabinet unit provides enough storage space for everything.
Lighting
Consider adding lighting to your cabinet wall unit to improve visibility and make it easier to find items.
You can install lighting fixtures above or under the cabinets, or inside the cabinets themselves. Consider the type of lighting that will work best for your space, such as LED lights, and plan the wiring accordingly.
Budget
Determine your budget before starting the project.
DIY cabinet wall units can range in price depending on the materials used, the size of the unit, and the features you include.
Determine how much you are willing to spend and select materials and features that fit within your budget.
Cabinet wall units can be an excellent addition to your home office. Consider the space and layout of your office, choose the right materials and tools, think about your storage needs, consider lighting, and determine your budget before starting the project.
With careful planning and execution, you can create a functional and visually appealing cabinet wall unit that enhances your home office.
How I Planned My Custom Home Office Built Ins
I knew I wanted my built in cabinets to be on a full wall in my office. Which left me with two walls to choose from. One that faced the windows and was connected to the wall with the door.
The other faced the office door and was on the end of the room, allowing the room to be elongated by the placement, and had the windows on the side. I went with the one facing the door.
How We Built Our DIY Built In Office Cabinets
I am going to break this down into sections for easy reference.
Removing The Trim
We started this project by removing the trim along the floorboard.
Once we determined the amount of space we had to work with, I shopped for the actual cabinet pieces needed to fill the space and execute the vision I had.
Because of the depth of the cabinets, we couldn’t go wall to wall without blocking the window. So we stopped short of going all the way across.
Tip For Consideration
You can choose to do wall cabinets for your base as opposed to base cabinets if you want cabinets that are not as deep. I wanted drawers, so I went with base cabinets.
This allows me to still hang curtains and also get all of the sunlight that the window offers.
I chose tall cabinets to be able to store my equipment and lights used for photo taking, a mix of drawers, and closed cabinets along the bottom.
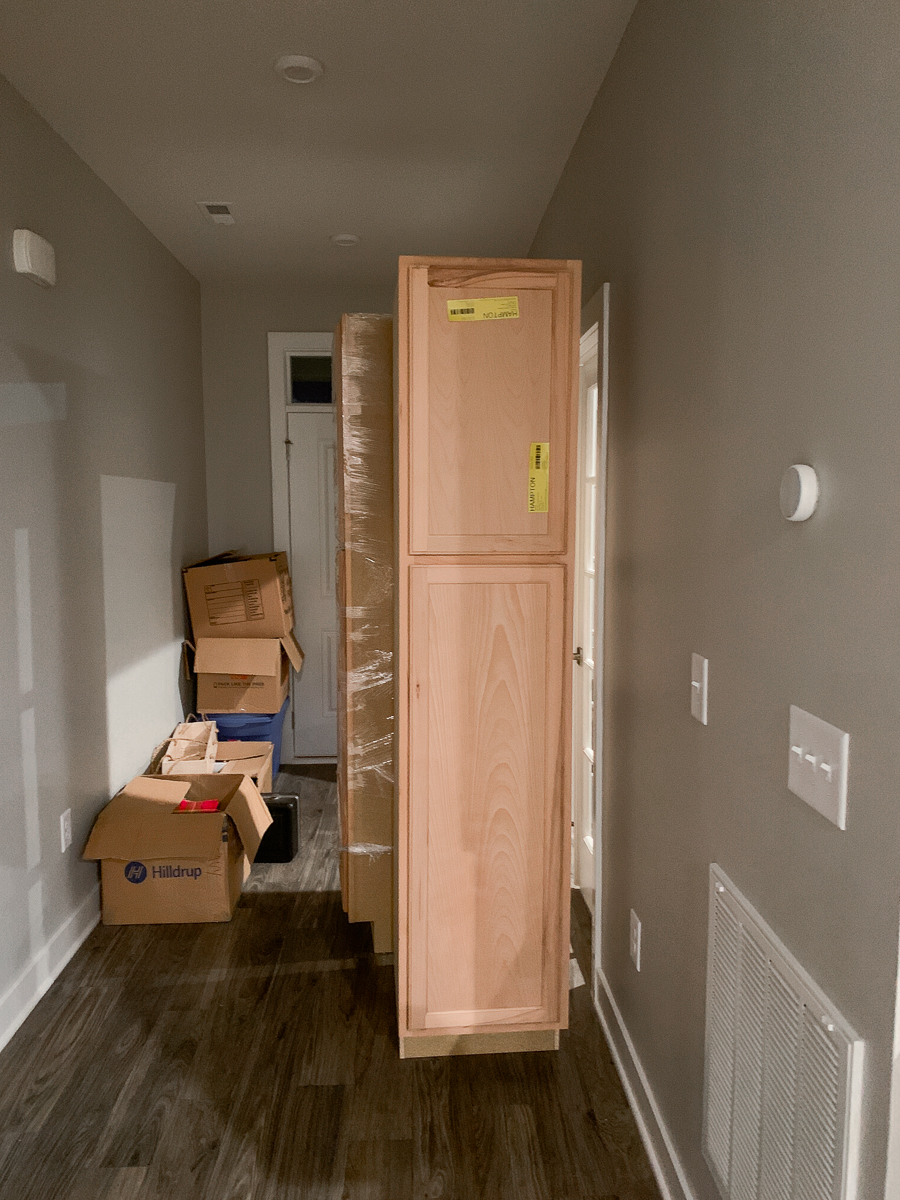
Installing Cabinets And Drawers
We arranged the cabinets and installed them by attaching them to the walls in the studs.
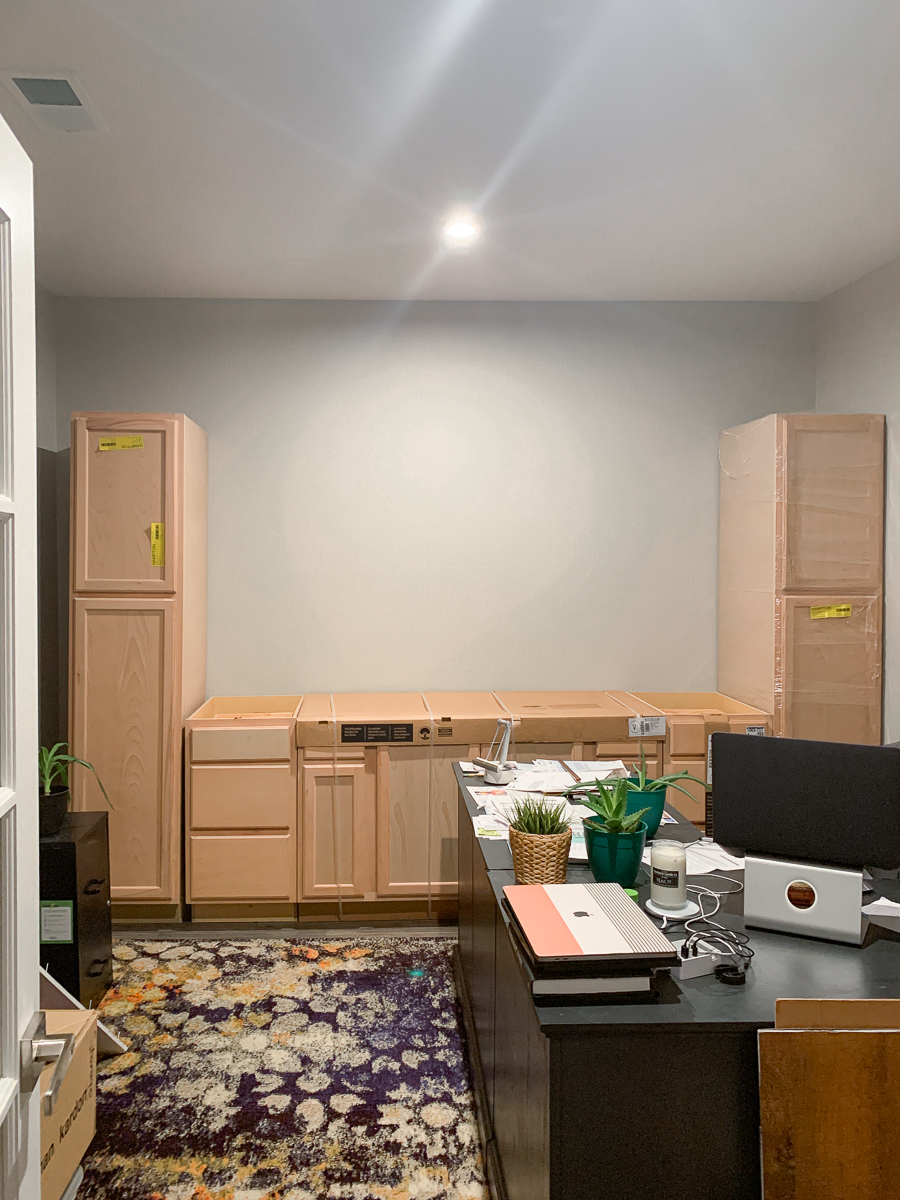
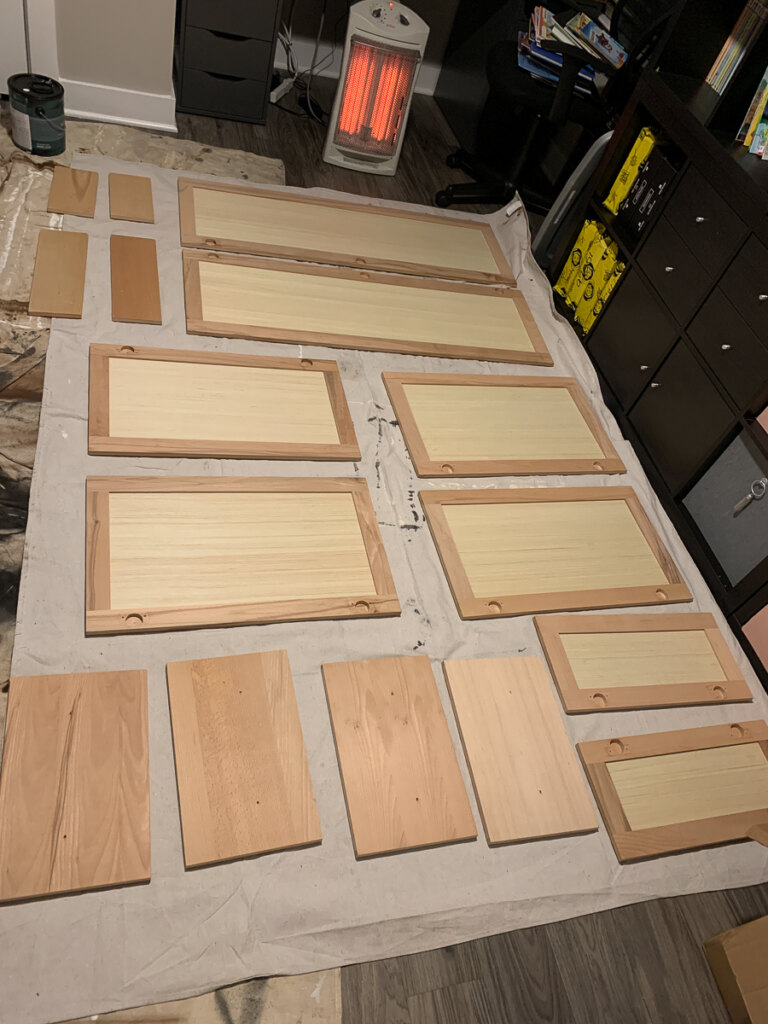
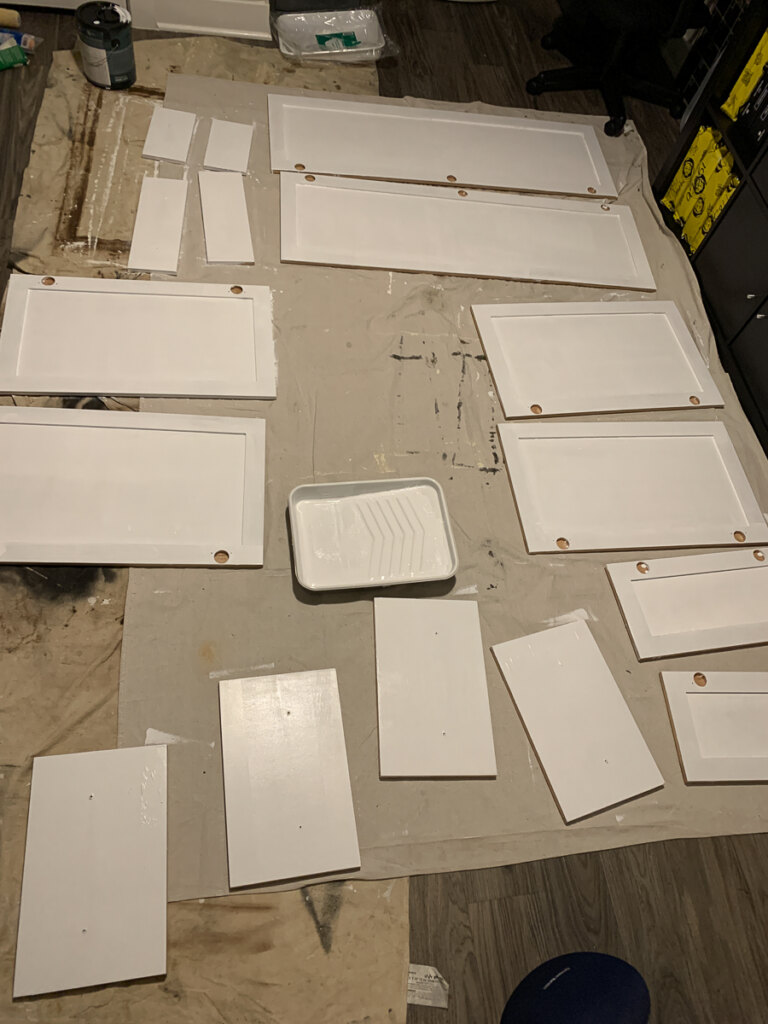
From there, we primed and painted the cabinets and drawers.
To do that, we removed the drawer and cabinet fronts and painted the boxes separately. I found this to make it easier this way when we painted our kitchen cabinets in our last home.
From there, we measured and purchased the wood to cover the open space, aka create the cabinet top, between the two taller cabinets.
We bought a piece of 4 ft by 8 ft wood and cut it to size. The top was then stained and topped with polyurethane to protect it.
The Wall Behind The Open Space
I knew I didn't want the wall behind the open spaces to just be a plain painted wall. I wanted it to be shiplap. When I found shiplap wallpaper from Target that went with the aesthetic I was going for, I was thrilled. This is similar to the one I got from target, but better priced.
I hung the wallpaper in the open space that would be the backside of the shelves.
This was so much easier, and not to mention cheaper, than installing real shiplap.
And honestly, no one that has seen it in person can believe it’s not real shiplap.
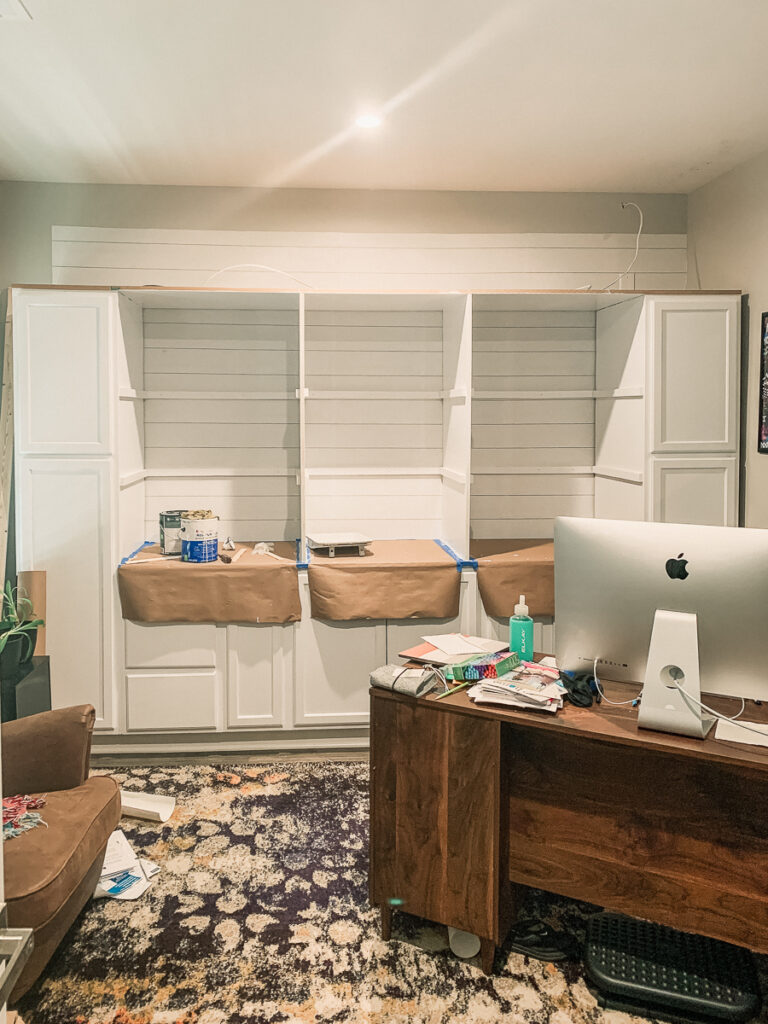
The Inner Wall Of The Open Cabinet Spaces
After I completed the wallpaper, using MDF, my husband created the inner walls of the cabinets.
What Is MDF?
MDF stands for Medium Density Fiberboard. It is a type of engineered wood product made by compressing wood fibers and resin under high pressure and temperature to create a dense, uniform panel.
MDF is made from wood fibers that are smaller than those used in plywood or particleboard, resulting in a smoother surface with no knots or grain patterns.
It is versatile and can be cut, shaped, and painted to create so many things, including furniture, cabinetry, and decorative moldings.
MDF is popular because it is strong, durable, and affordable.
It is also an eco-friendly alternative to solid wood, as it is made from recycled wood fibers and is formaldehyde-free.
MDF is a great wood alternative when you are going to be painting the exterior. It’s sturdy and slightly cheaper, but it is worth noting that cutting it creates a mess!
The Inner Shelving Of The Built Ins
Once the walls were done, we measured for the inner shelving. Because I wanted the contrast of stained and painted wood, we used real wood here. We used another 4-foot by 8-foot piece of wood. And were able to get the 6 shelves out of it by cutting them to size.
We installed supports for the shelves using wood pieces that are 1 inch deep in thickness and 2 inches tall. Cutting them to size to fit under the shelves.
This allowed us to use thinner wood and create the illusion of chunky shelves.
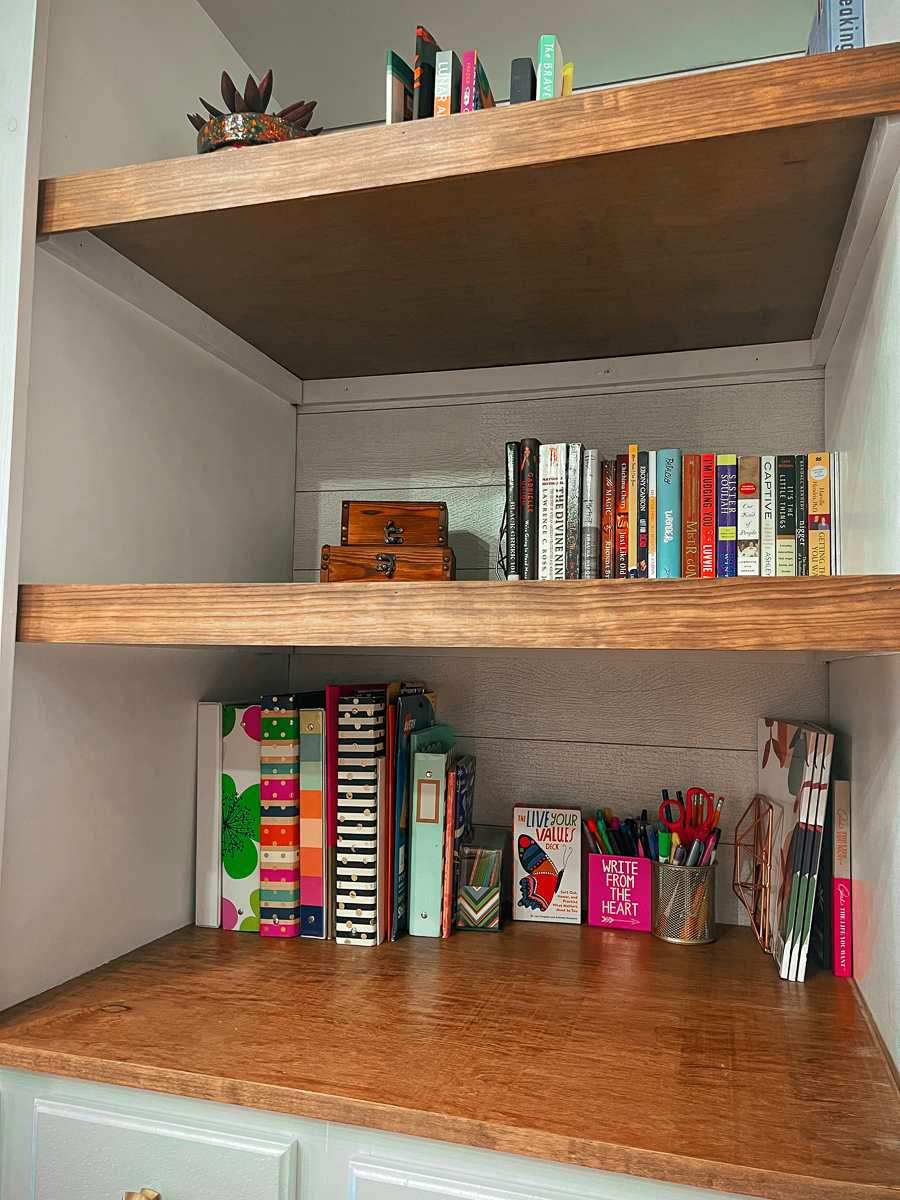
How We Created Faux Thick Shelving
The 4 by 8-foot board that we used is roughly under 1 inch in thickness. But I wanted shelving that was thick. That would have required wood that was much heavier and also more expensive.
Instead, we installed the shelves and then attached a piece of wood that was almost 2.5 inches wide to the front of it for the appearance of thick shelving.
Electrical Wiring For Lighting
At this stage, we had an electrician come and run the wiring for the lights.
Behind the bookcase is an electrical outlet that was already wired. So since I’m not likely to use that outlet anymore, he was able to wire the lighting to the switch associated with that outlet.
This was done at this stage before everything was closed all the way.
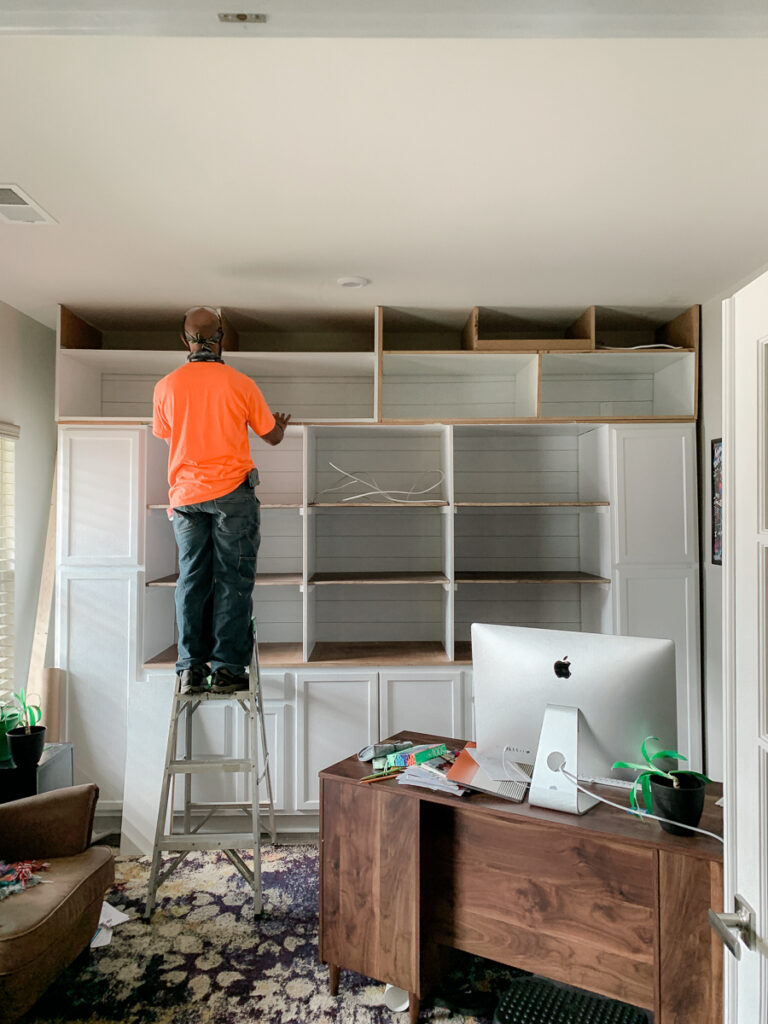
Closing In The Shelving + Building The Upper Shelving
We ran an MDF board across the top to support the weight of the upper shelving units.
The upper shelving units were also built using MDF. Hubby built these based on the fact that I wanted four equal open shelf areas.
It was built in two separate identical sections that each contained two shelves because it was easier to install and also to help distribute the weight properly.
He sat them on the MDF support we put up and secured them.
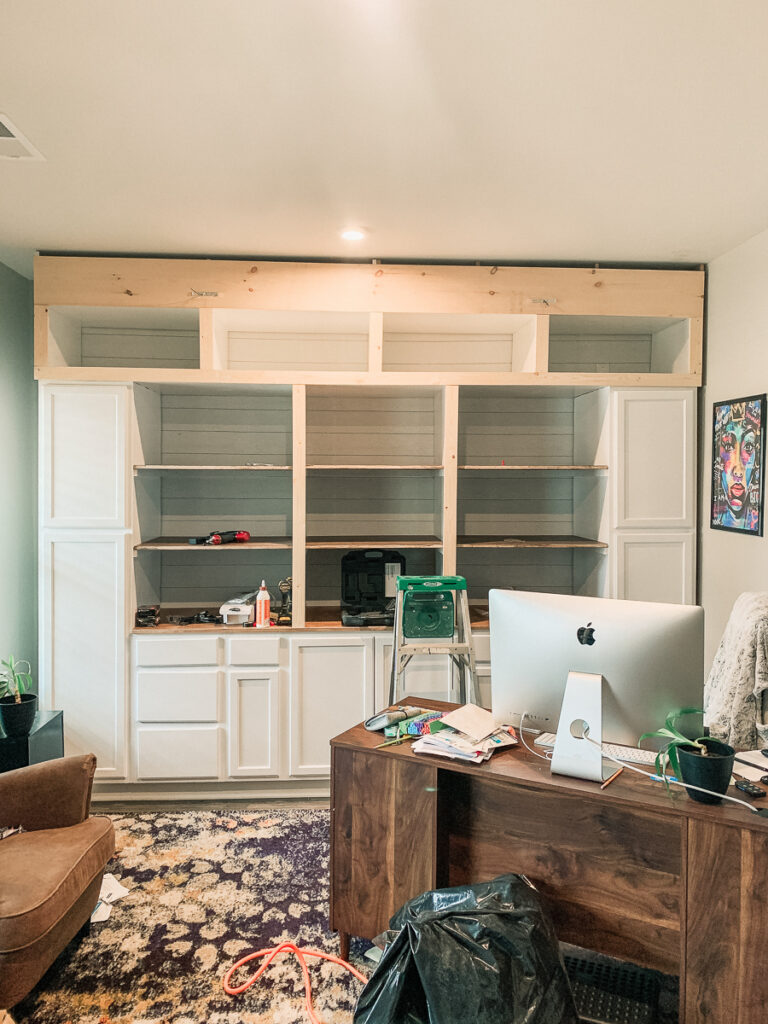
Once they were installed and secured, we had one more task we needed to complete before we could frame everything in and extend the cabinet to the ceiling.
Once hubs had wire to connect the fixtures to at the top, he was then able to close everything in and attach the fixtures to the cabinet.
Installed Light Fixtures
The old man measured and cut the wood he would need to enclose everything, leaving only a slight bit of a gap at the top that would later be covered by crown molding. Once he was comfortable with the fit, he asked me to mark where I would like the lights so he could drill holes to attach the fixtures and connect the wires.
After the electrician got us some “juice” to tie into, hubby was able to connect the wire for the fixtures, test that they worked properly, and secure the piece of wood to the cabinet so that no wire would be exposed.
These are the light fixtures I decided on. And I use Edison smart bulbs in them that allow me to connect them to my Alexa Echo Dot.
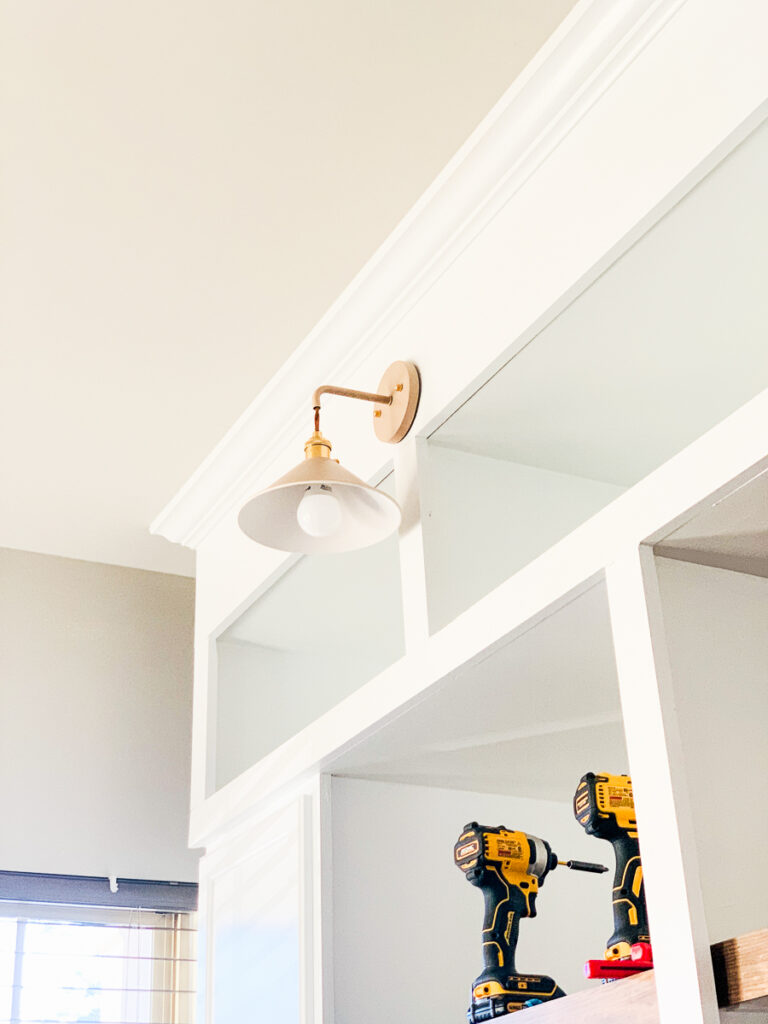
Crown Molding
There are several profile styles of crown molding to choose from, including Colonial, Shaker, and Modern. We chose Colonial pine for this cabinet, but choose a style that suits your taste for the space you are in.
Keep in mind that there are also different sizes of crown molding. Make sure that you choose one that is a bit smaller; it’s usually at least an inch smaller than ceiling molding.
The most difficult part of installing crown molding is what makes it look so cool when it's done. That is cutting a compound miter joint at each corner. I won't get into how to cut these types of joints here, but just know that he went with what he called the “non-compound” way of cutting it by placing the molding vertically on the saw as opposed to laying it flat because it tends to be easier.
The way the cabinet sits, as you can see, he only needed to cut one miter joint for the left side.
Once he measured the length of the left side and the front of the cabinet, he made the crown molding cuts and attached the pieces of molding using a 16 gauge finish nailer and filed the joint with a little bit of caulk to seal it and give it that finished, clean look.
Installed Hardware
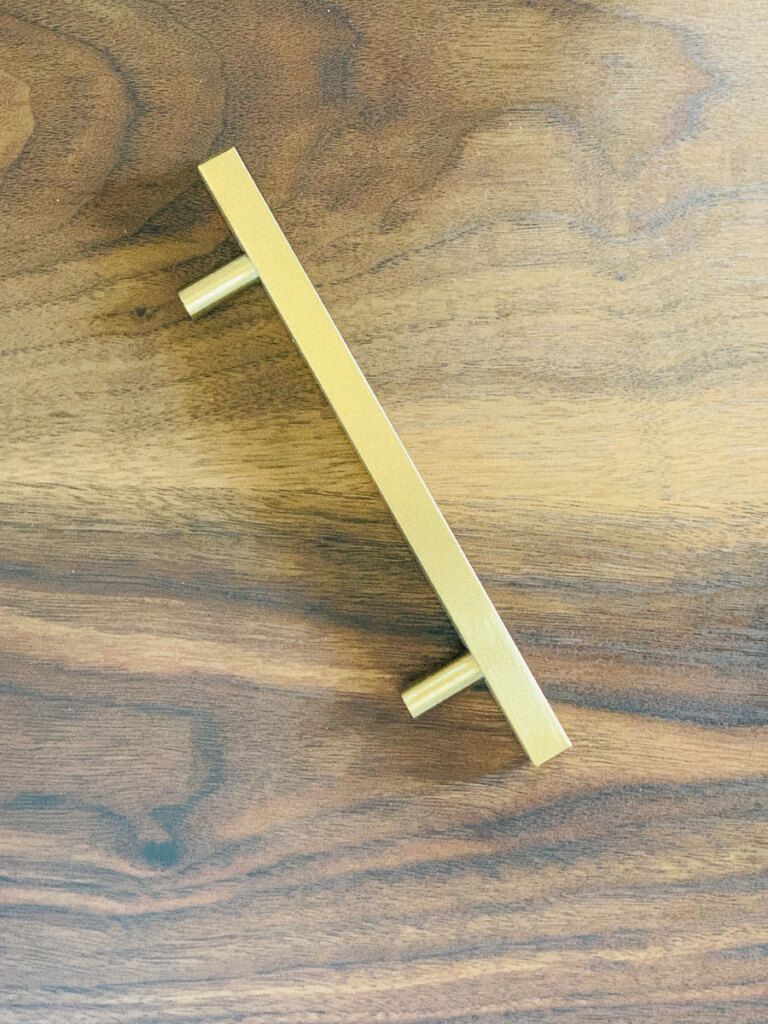
Adding hardware to the cabinets was the finishing touch for this project.
I surprised my husband because I went with a brass/gold look which I had previously sworn off.
But with the white that we chose for this project, the gold just really made it pop. I used my cabinet alignment tool to install the hardware as outlined in this post here.
The knobs I used have been discontinued. But this is a similar one.
And that’s it!
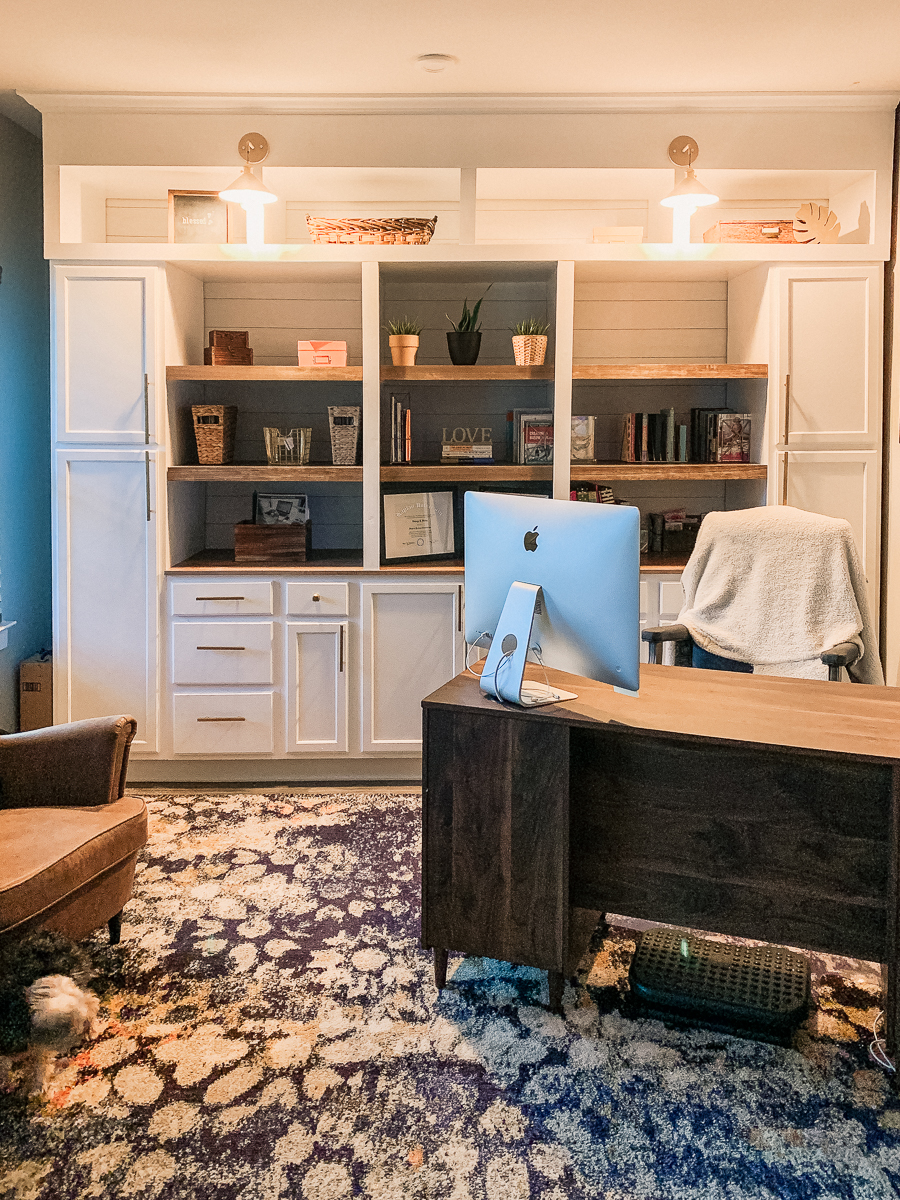
Total time for this project, with us working on it over the weekends and some evenings, was roughly 4 weeks.




I love everything about this!
Thank you so much! It was definitely a labor of love. 💕